# Client-side actions

Connect an AI action to a JavaScript function on the page hosting your chat widget.

## Overview

Run client-side code lets an action use functionality on your own website. Your page registers a named handler, and the chat widget calls that handler when the agent selects the action. This is useful for reading a cart or updating a page interface.

> **Browser channels**: Client-side actions are configured for Chat bubble or Help page. The page hosting the widget must register the function; a registration on another page does not apply to it.

## Configure the action

1. Create a Custom action and choose Run client-side code.
2. Enter the action name and When to use instructions.
3. Add the inputs and a description for each. Match the names your function expects.
4. In Connect your website, copy the registration snippet. Use the exact function name shown there.
5. Add your implementation to each page that embeds the widget, after the embed script.
6. Check I've added this code to my website, save, and enable the action on a browser channel.

![Connect your website](/docs/screenshots/original/qwryai-client-action-setup.jpg)

Copy the exact generated function name from Inputs, implement the handler on your website, and confirm installation before enabling.

## Read the current page

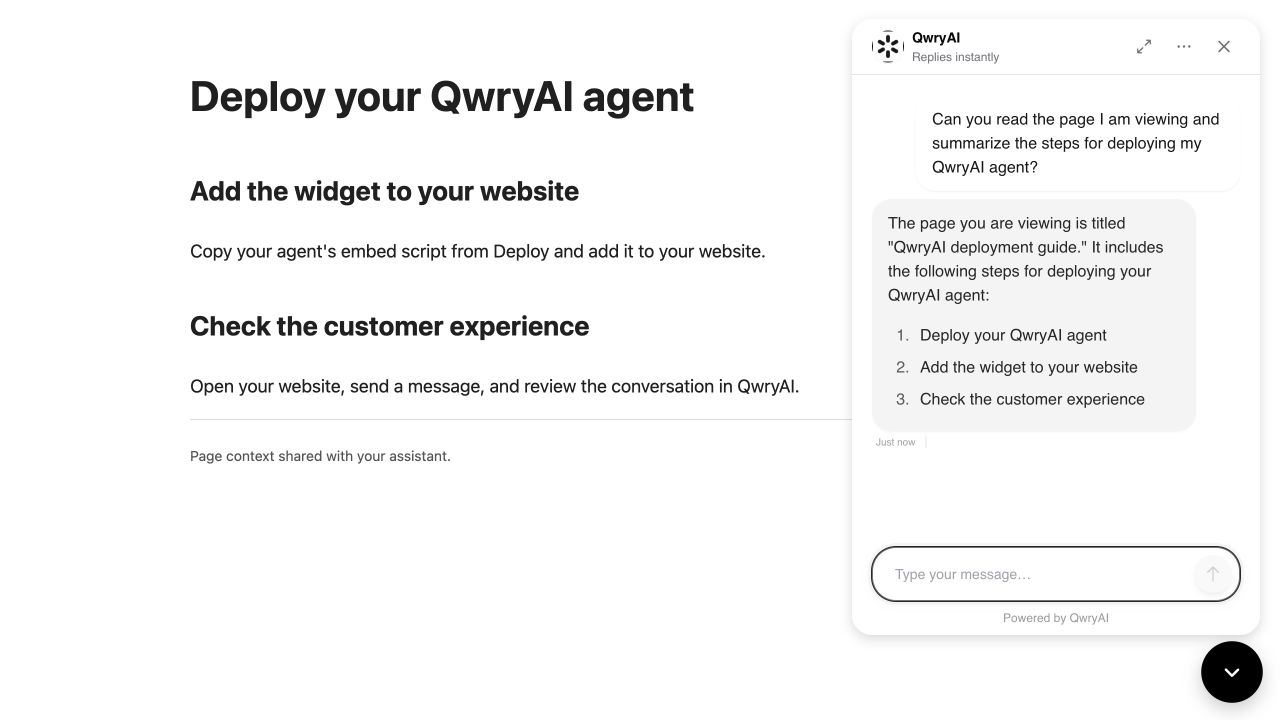
A support assistant can read the page a visitor is viewing before explaining the next step. This example returns the page's actual title and headings. Save it as an HTML file on a permitted domain, replace the embed URL with your Deploy snippet, and replace Read_current_page with the exact function name generated by your action. Configure the action with no inputs and describe when page context is needed.

```html
<!doctype html>
<html lang="en">
<head><meta charset="utf-8"><meta name="viewport" content="width=device-width, initial-scale=1"><title>QwryAI deployment guide</title></head>
<body>
  <h1>Deploy your QwryAI agent</h1>
  <h2>Add the widget to your website</h2>
  <p>Copy your agent's embed script from Deploy and add it to your website.</p>
  <h2>Check the customer experience</h2>
  <p>Open your website, send a message, and review the conversation in QwryAI.</p>
  <p id="result" role="status">Page context has not been requested.</p>
  <!-- Replace this URL with your script from Deploy. -->
  <script src="https://www.qwryai.com/widget/script/YOUR_EMBED_KEY"></script>
  <script>
    window.qwryai("registerTools", {
      Read_current_page: async () => {
        try {
          const data = {
            title: document.title,
            headings: Array.from(document.querySelectorAll("h1, h2")).map(heading => heading.textContent.trim())
          };
          document.getElementById("result").textContent = "Page context shared with your assistant.";
          return { status: "success", data };
        } catch (error) {
          return { status: "error", error: "The page context could not be read." };
        }
      }
    });
  </script>
</body>
</html>
```

![A real page-context response](/docs/screenshots/original/qwryai-client-action-result.jpg)

The embedded QwryAI agent invokes the registered handler and answers with the actual page title and headings. The page confirms that context was shared.

## Handler contract

| Value | Meaning |
| --- | --- |
| args | The input values supplied to the action, addressed by your configured field names. |
| user | The visitor context supplied by the widget. Treat browser-provided values as untrusted at your server. |
| { status: "success", data } | Return JSON-compatible data the action can use. |
| { status: "error", error } | Return a useful error message when the operation cannot complete. |

> **Register together**: One registerTools call replaces the previous registry. Register every client action in the same object so a later call does not remove an earlier handler.

## Connect your application

Read the information your website actually displays, or call your own authenticated backend when an action needs account-specific data. Keep private API credentials on that backend, validate action arguments there, and check that the signed-in user can perform the requested operation.

If you rename the action, copy the current function name again and update your registration. Keep the script order shown in the example so registration runs after the widget script.

## Troubleshooting

| Symptom | Check |
| --- | --- |
| The widget does not load | Use the exact Deploy snippet and a permitted domain. |
| The action cannot run | Check that its generated name matches the registered property exactly, and the registration executes on this page. |
| One client action stopped working | Combine the handlers into one registerTools call. |
| The action runs with missing data | Review input names, Required settings, defaults, and descriptions. |
| It works in a demo but not your site | Check script loading order, browser errors, and whether page navigation removes or replaces the registration. |